Pages

Thursday, October 31, 2013

Happy Halloween!


Just wanted to wish you all happy and safe Halloween!  I ended up throwing together a costume from the "so stupid it's funny" video What Does the Fox Say? and Matt was Uncle Si from Duck Dynasty.

What did you all dress up as?  I'd love to hear all about your unique and fun costumes!


Wednesday, October 30, 2013

Roasted Pumpkin Puree and Toasted Pumpkin Seeds


Last week was so busy that we didn't have time to carve pumpkins.  We normally carve pumpkins every year so I was a little bummed.  When I was at the grocery store the other day, I picked up a small pie pumpkin.  I had intended for it just to be a nice little fall decoration but decided to hack it up and roast the seeds and make some homemade pumpkin puree.

Has anyone else ever made homemade puree out of a pumpkin?  It is really quite a simple process.  Wait.  I take that back.  There is one very difficult part and that is cutting the pumpkin open.  It felt like I was cutting through steel and I'm surprised I didn't slice a finger off.  At one point, I even considered taking an ax to the thing.  So do you want to make some homemade pumpkin puree now?  Sorry for scaring you.  Once you get the sucker open, it's all smooth sailing from there.  Just make sure you use a sharp knife and be careful.

I have always gotten my pumpkin from a can so it made me feel very pilgrim-like to roast it from scratch.  After conquering that, I feel like I could live off the land.  Maybe I will harvest and grind my own wheat next.  You never know... I'm crazy like that.

 Cut the stem out first just like carving a big pumpkin.  Keep in mind that the pumpkins you carve are not ideal for roasting.  You want to use a pie pumpkin or sometimes also called a sugar pie pumpkin. This one is about 4-5 pounds.

 Slice the pumpkin down the sides.  Easier said than done.  These smaller pumpkins have some thick skin!

 Remove the seeds and guts.  Save the seeds to roast.  Lay it down on a foil lined cookie sheet.  Do not add anything.  No oil. No salt.  Nothing.

 Place in a 400 degree oven and roast for 45-60 minutes. Placing a bowl of water on the bottom shelf will make sure the pumpkin doesn't dry out.

While the pumpkin is roasting, rinse off the seeds.  Remove any large pieces of pumpkin.

 Lay them out on a paper towel to drain.  This is very important because you want them to evenly cook and not burn.

Once dry, scatter over a lined cookie sheet.  I have seen seeds roasted with loads of different flavors but I am classic and prefer them the same way each year; olive oil, salt, pepper and garlic powder.  If it aint broke, don't fix it!

Remove the pumpkin from the oven and test to make sure the flesh is soft and roasted all the way down to the skin.  Now is a good time to reduce the temperature in the oven to 350 degrees so you can roast the seeds.

Scoop all of the flesh out with a spoon and throw it into a food processor with the blade attachment.

 The pumpkin should be very moist so no need to add water unless it appears dry.

 Turn the food processor on and let it roll for about 1-2 minutes.  As evidenced my by finger mark, I had to test the consistency.

 The finished product.  My 4-5 pound pumpkin yielded about 3-4 cups of puree.

 Immediately after, I made the MOST delicious pumpkin cake with a brown sugar, oat and pecan crumble topping.   I'll be posting the recipe later this week and it is definitely a keeper!

Then I portioned put the remaining puree into Ziploc sandwich bags and placed in the freezer for later use.

 Once the seeds are toasted, let them cool.

And toss them in a bowl and see how long they last.  Around here, ours disappear pretty quickly!

Roasted Pumpkin Puree
1 4-5 pound pie pumpkin

Preheat oven to 400 degrees.  Remove stem and slice pumpkin in half.  Remove the seeds and guts until the pumpkin is clean.  Save the seeds.

Place the pumpkin halves skin side down on a foil lined baking pan. Roast in oven for about 45-60 minutes or until the flesh is perfectly soft all the way down to the skin.

Remove from oven and scoop flesh out into a food processor.  Blend for about 1-2 minutes until mixture is completely smooth.

Portion out puree into one cup servings, place in baggies and freeze for later use.  

Toasted Pumpkin Seeds
1-2 cups pumpkin seeds
1 teaspoon olive oil
1 teaspoon salt
1/2 teaspoon pepper
1/2 teaspoon garlic powder

Preheat oven to 350 degrees.  Remove seeds from the flesh of the pumpkin.  Clean off any flesh from the seeds, place them in a colander and rinse.  Turn out onto a few layers of paper towels and let them dry.

Place seeds on lined cookie sheet and toss with oil, salt, pepper and garlic.  Bake in oven for 10-15 minutes.  Remove from oven and let cool.  Store in an airtight container to make the last longer.  

Sunday, October 27, 2013

Buffalo Chicken Pizza


It snowed here in Cleveland this week!  My perfect October has now been tainted with a snowstorm... already?!?!  It was actually really bad and took me over 2 hours to get to work on Thursday.  I hope this is not an indication for what this winter will bring... sheesh!   Today is a little chilly but the sun is peeking out and that is always a good thing in this city.

Speaking of good things in this city, I wish I could include the Browns in that category. Unfortunately, our team has been nothing but heartache. We've been in a "rebuilding" status for as long as I can remember.  One thing about Cleveland though; we are resilient.   We are not fair weather fans.  Regardless of how pitiful our team is, we always show up and rally on for the Brownies.  And at the end of the season, we faithfully repeat that "There's always next year..." in hopes that we might eventually have a winning team.  I'm still waiting.

There is something about football season that calls for game day food and this Buffalo Chicken Pizza fits the bill perfectly!  When I made this, we had our friends Ryan and Nikki over for the game and it definitely received two thumbs up.  I feel like anything buffalo, screams football so this was a very appropriate dish.

You still have time to gather the ingredients, make this for your game day gatherings today and cheer on your team.

GO  BROWNS!! 


Buffalo Chicken Pizza
makes 2 pizzas
2 balls of pizza dough (I grabbed mine from a local guy but you can always make it with this recipe here)
3 chicken breasts, seasoned and grilled
3 cloves of garlic, minced
1/3 cup of buffalo sauce (I used Franks)
1/2 cup of light ranch
1 tablespoon olive oil
2 tablespoons butter
16 ounce log of fresh mozzarella, sliced thin
1 block of provolone, shredded
1 small block of blue cheese, crumbled
3 scallions, chopped

Preheat oven to 415 degrees

First, grill the chicken.  You will want to give it some time to rest.  I just seasoned ours with a little olive oil, salt, pepper and garlic powder.   Once it has cooled, chop into bite size pieces.  

Next you need to make the sauce and garlic-butter-olive oil.  Chop up garlic and divide in half.  In one bowl, add buffalo sauce, ranch and garlic.  In another bowl, add olive oil, butter and the other half of the garlic. Microwave this for about 30 seconds until melted.

Shred, crumble and slice your cheeses.

Roll out the pizza dough and place on a pizza stone or on a parchment/Silpat lined cookie sheet. Brush the buffalo mixture all over the pizza, leaving the edges bare. Rinse your brush and then coat the edges with the garlic-butter mixture.    

Top pizza with chicken, mozzarella, provolone and blue cheese.  Bake in oven for about 15 minutes.  Remove from oven, brush edges with more garlic-butter and let it slightly cool.  Top with sliced scallions, more buffalo sauce then slice and serve.


Thursday, October 24, 2013

Homemade Fried Rice


So... tired, grumpy, stressed Heather is long gone and happy, optimistic, enthusiastic Heather is back!  Why, you ask?  Because my Truffled Mushroom Deviled Eggs recipe was featured on BuzzFeed!  After a treacherous two hour trek into work, I saw that I had a TON of page views that were coming in from BuzzFeed.  Curious me clicked on the link and found the article featuring my recipe!  The crappy-ness that has been this week was instantly forgotten.

We've all been there.  Ordered Chinese takeout and had the leftover container of white (or brown) rice.  Don't you dare toss it because the best fried rice you've ever had is just a few steps away.  And for me, that does not include peas or those perfectly square carrots.  I've even thrown chicken, pork or shrimp into this to make it more of an entree.  It's quick and easy and the perfect leftover dish.

Whether you came here through BuzzFeed or just because, I just want to thank you for taking the time check out my recipes.  Cooking is my passion and I plan to continue documenting my fun in the kitchen!

See this plain, bland rice?  You are about to turn this into someting wonderful!

The bacon (and it's rendered fat) adds great flavor to the rice.  Don't skip this... unless you are a vegetarian.


Remove the bacon and drain on paper towels but leave the fat in the pan.

Add the chopped onions and cook until softened and slightly caramelized.

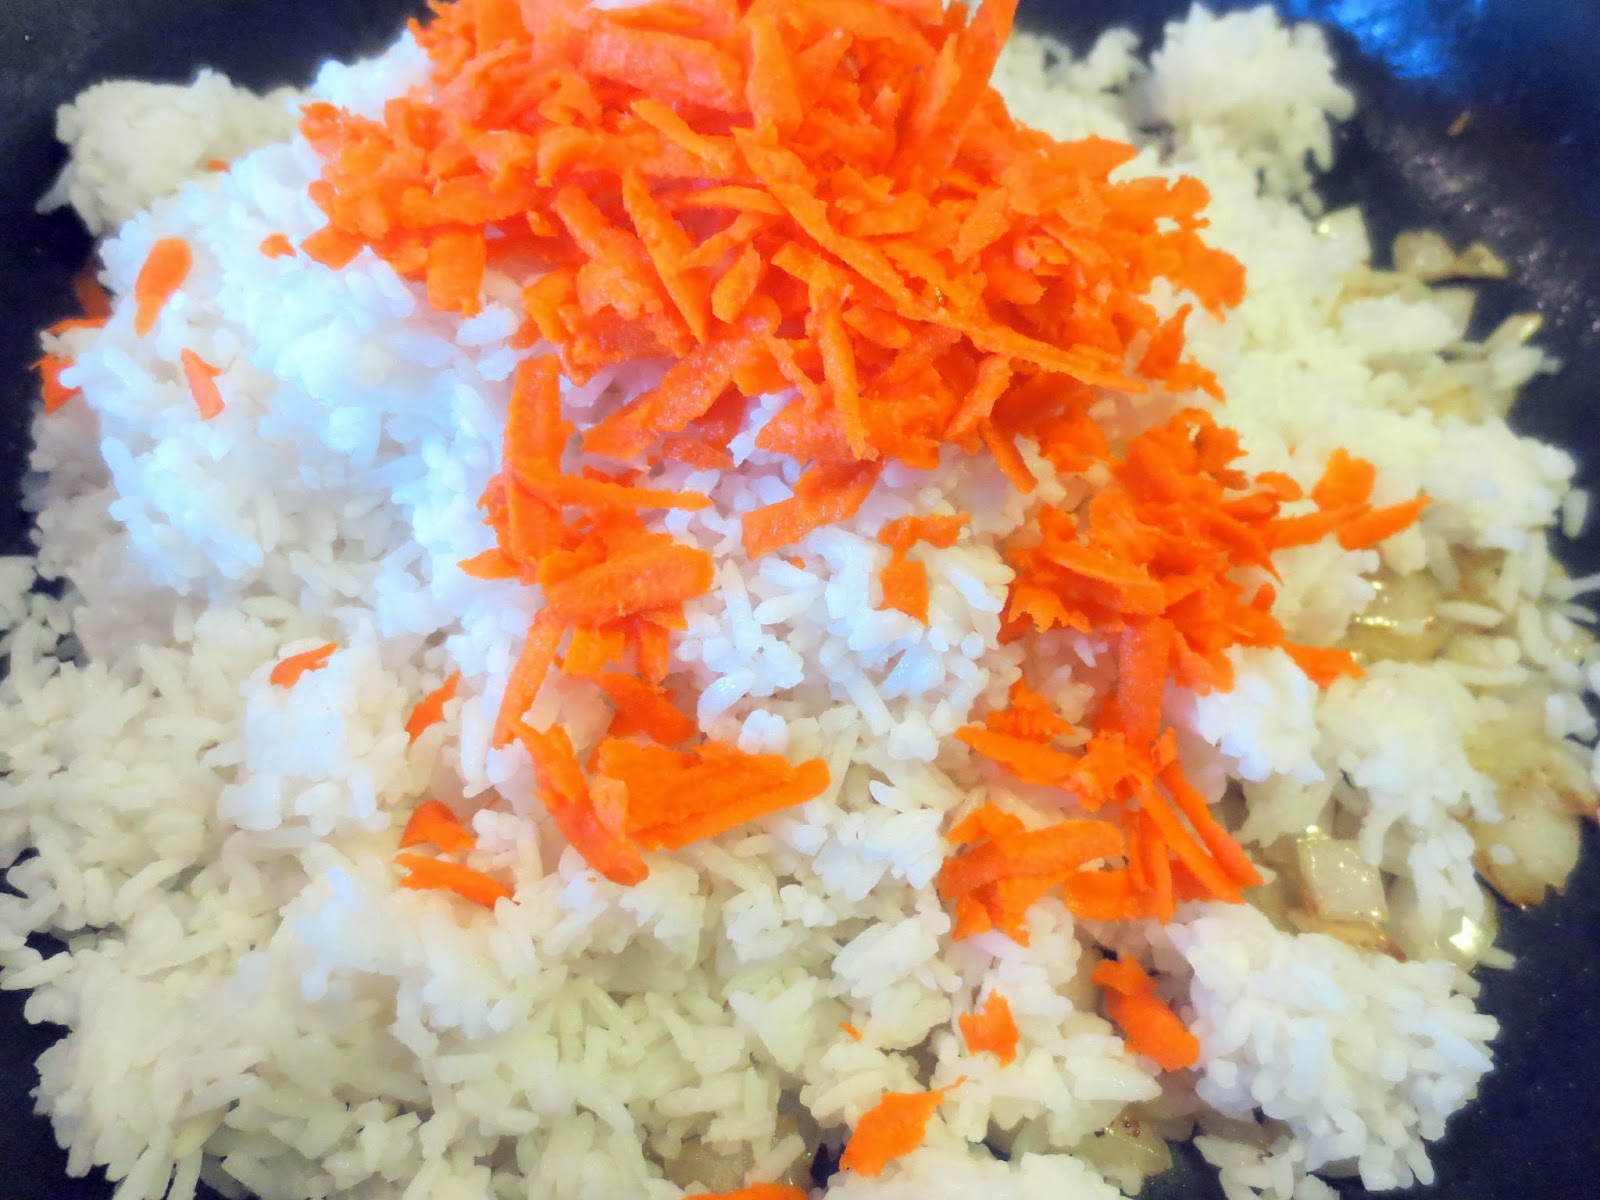
Take a large carrot and run it through the grater.

Add the grated carrot and rice to the onions.  Stir to combine.

Now it's time to add more flavor.  First up, toasted sesame oil. This stuff is great.

And now the soy sauce.

Scramble some eggs with a pinch of salt.

Push the rice to the sides of the pan and form a well.  Place butter in the pan and melt.

Add eggs and let cook.

Use a spatula to gradually scramble the egg.

Once eggs are cooked, use the rubber spatula to pull down the rice and mix into the egg.

Once the egg is all mixed in, add the green onions. I like to cut mine on a diagonal so they look pretty.

Finally, add the crispy bacon back as well as the sesame seeds.

Homemade Fried Rice
4 slices of bacon, chopped
1/2 sweet onion, diced
1 quart of white or brown rice
1 large carrot, peeled and grated
2 teaspoons toasted sesame oil
5 tablespoons low sodium soy sauce
1 tablespoon butter
2 eggs, scrambled with a pinch of salt
2 green onions, finely sliced
1 tablespoon sesame seeds

Preheat large saute pan over medium heat. Chop bacon and add to hot pan.  Cook until bacon in crispy.  Remove from pan and transfer to a a paper towel lined plate.  Leave grease in the pan.

Add onion to pan and saute until softened and slightly caramelized. Toss in rice and grated carrot.  If the rice is a day or two old, you may need to use your hands to break up the clumps of rice.  Stir to combine everything.

Add sesame oil and soy sauce and stir to coat the rice.  I love the sesame flavor but it can be strong.  Try adding 1 teaspoon at first and add more if desired.

In a separate bowl, scramble 2 eggs with a pinch of salt.  Keep the rice over medium to medium-high heat and push all of the rice to the sides of the pan to form a well.  Place butter in the well and melt.  Pour eggs into the well and let the bottom set.  Slowly push a rubber spatula over the bottom and scramble the eggs.  Once the eggs are completely cooked, bring rice down from the sides and mix eggs throughout the rice.

Finally, add the green onion, bacon and sesame seeds.  Mix everything together and it is ready to serve.  


Pin It button on image hover
Related Posts Plugin for WordPress, Blogger...